Wednesday 14 September 2011

Week 5 (of 5) Sustenance


The final week or more half-week to finish the laser cutting workshop.
The 'Crit' on monday seemed to go ok, but I wasn't focusing on the architectural purpose of it all, more the aesthetic. I needed a motive, more of a purpose than to look good, the idea of the different heightened roofs/walls played a big part in this, they allowed different amounts of light to enter the modular rooms, creating different moods/feelings for the different paintings in the rooms.

there was also a fine line between been inside the 'art gallery' and been outside to the park and roads, which was suggested by Roberta that it needed to be more distinct and apparent, and working with this idea as-well as the use of light. She suggested I look at a very famous artist 'Piet Mondrian' Who made a step towards abstractness, which I embarrassingly couldn't recall until I looked at some of his works at the Elam library. My concepts were similar to that of Mondrians, and I new what the tutors were getting at as soon as I looked at his (later-as opposed to earlier) paintings.
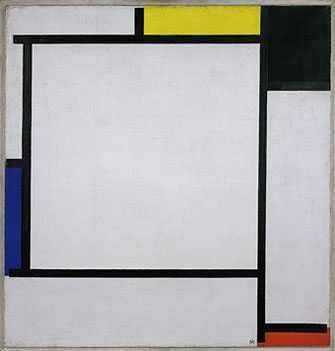
Piet Mondrian, Tableau 2, 1922.
Piet Mondrian "Composition With Yellow, Red, Black, Blue, and Grey"
Above are some of his later paintings from a natural, realistic and refined/distilled contoured planes of not only trees but cities. They were very similar to my previous drawings of aerial view, and with some research I put some of his ideas to mine own work, mixing them with the idea of light entering the building to form different moods for the somewhat simple rooms
Monday night was a very busy time, developing the design into a final, and then drawing it to scale, above shows the first attempt to a 1:20 scale drawing of the plan


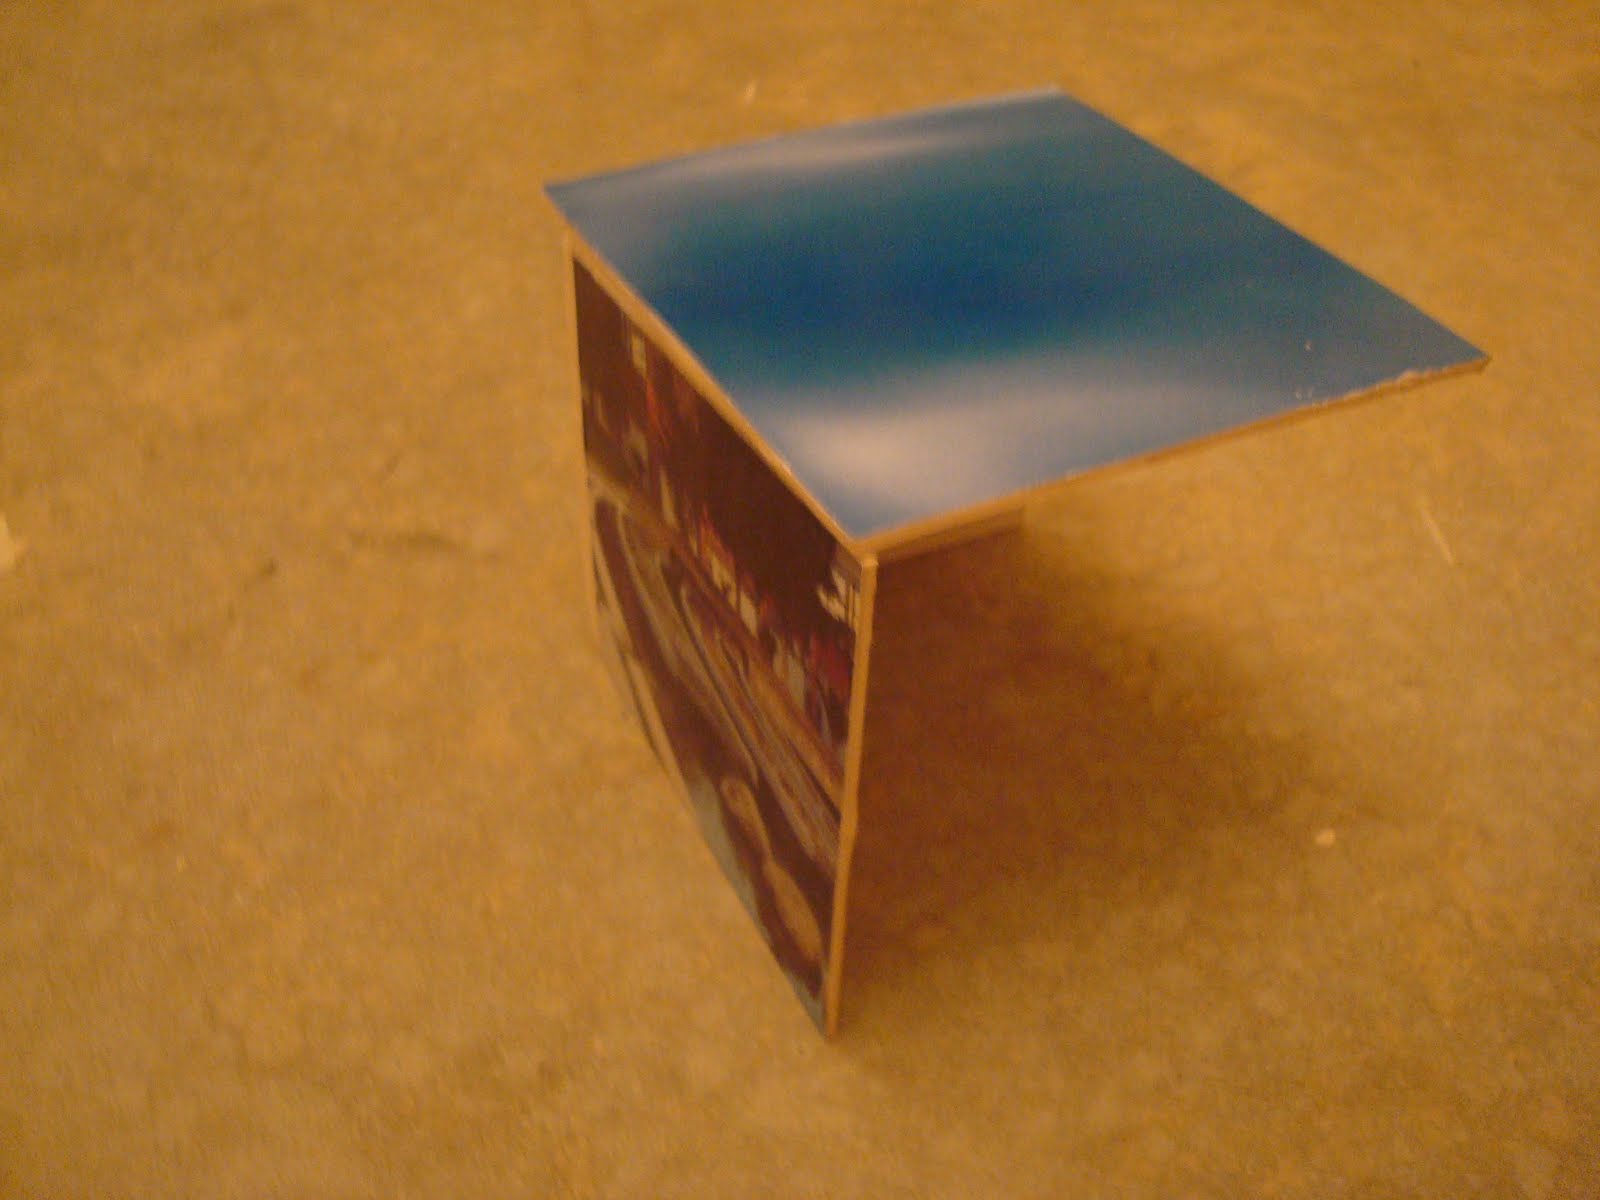
I worked on some more drawings, mainly in plan and elevation views. I had come to an 'answer' for the market stall, with an artistic based structural design, and a familiar art gallery feeling to it, focusing on the light that floods into the different openings and slits that are between each roof space and height, it did look bizarre in a way, but thats what attracts people to it...a different, unique building space for the public to enjoy what i've created in my own time. 
The near final 1:50 drawing, darker/thicker lines indicating the walls under the roofs, which led to the much larger 1:20 plan
Working out heights and how people may compare in size to the surrounding walls/roofs
 The final design on paper, full sized 1:20, with many measurements written down in the process, its off this A3 page that I created the file on illustrator, referring back and fourth to the dimensions
Close up of the centre walls, where much of the light floods through, at 3.25m's (3250mm)
Measurements in the centre represent the height, I had to work out the real measurements from the 1:20 to 1:1, apparently there was a way to make it scaled on illustrator but I decided to go for the real measurements

I spent much of monday night drawing it up to scale (as shown above), then much of tuesday making it on the computer, making sure each joint, height and width is perfect to fit...without making a mock up model it was hard to tell if it was in fact going to fit together perfectly, but I just had to wait and see and hope for the best. Due to the uni laser cutter been moved it was getting busy and it was not possible to hand it in in the mid afternoon, so a group of us now have to find a new place (as its out of action for a week or so). Yes we took extra long to make the final computer models, but the fact they decide to move it during the end of semester (with two weeks left till the holidays) we were annoyed to find that they didn't just wait till then, but no, they decide to move it when people need it most.

So we are heading over to a place at the top of queen street, and hopefully they will be able to help us, otherwise its AUT, and apparently they are a bit grumpy...how surprising. I should have worked out my final model earlier, but when it still needs change on monday I find it  a bit difficult to accomplish this quickly, but I will have to learn to adapt to it...

Wednesday 3 August 2011

Week 3 Final Details

The next day i headed back to the workshop down at Elam, and started cutting and bending away of the last 3 (of 4) joints, it did take quite a while to finish, and still many steps ahead of me. But i had gotten the hang of how to make the joints and my confidence of using the machines/tools had improved greatly. Once all the joints were in place, I began soldering it all together, with some help in some places by the metal workshop tutor. It was beginning to take shape, and looked great, especially for something i've never dealt with before, and it was a tricky joint to make. They were a great help down at the Elam workshops, especially since there open from monday to friday...


 Above shows various views of the finished joints, which then need to be soldered.
 Above left is the soldering iron in its natural form, it is preheated-connected to wall socket-and combined with solder to make the joint joined and solid. 
 The soldering usually leaves a burn mark, which can be easily sanded down.
 Soldering metal and liquid used for pre-soaking the sanded down metal edges.


The above three photos show the main bending and cutting machines.

I took it home, and began sanding down the solder with some standard sandpaper, then once all the solder was sanded to the right amount I painted it with two coats of white primer, then two coats of white spray paint. Once it was all dry I peeled back the cover sheets on the perspex, and with some help of the family stuck all the black 5% tint on the Screen. I would have liked it to be a reflective surface, but time meant ordering the expensive reflective cover sheet meant i had to stick with the 5% black tint-used for cars-was too late...but hey, maybe the black and white-frame-will look better? This of course changes the idea behind it slightly, but this is what happens...Below are the final photos of the 1:1 model made from aluminum metal framing, 3mm perspex, and white spray paint with white primer and gloss finish, a strong glue was used to stick the roof down.


Above three photos show the metal being primed, with white acrylic paint, then spray painted over and over again (roughly three times) to give a nice solid, even white coat. It was then sprayed with gloss to harden the coatings together.

 Above shows the glue used to stick down the roof, lets hope it stays that way, not the best trusting glue...look at the catch phrase...
 With the roof stuck down, it all came together, even if it isn't perfect, which it isn't, this was more of a learning curve than trying to claim perfection on a 1:1 model that i actually have never worked with before.
The black tint is purple? Oh well, it still looks pretty good.
 Some more shoots of the final product.

What did i learn for the past few weeks? Well, I learnt about patch dynamics, weather and materials, how to make metal joints and how to solder, the idea of working with the whole space-in-turn with a small, important detail of the buidling, also about augmented reallity, and found a new artist who I think does some amazing work-Ben Heine. And i learnt that building even a simple model and prove to be somewhat very expensive, for both time and money...


Tuesday 2 August 2011

Week 2-3 Detail

First week Consisted of drawings, building up of ideas, and quick model making to prepare for the final detail of  building joint of 1:1. Just my luck a gust of sickness spread across me for pretty much the entire week, and it was a very slow start, and it was really only saturday where I had finally produced a final idea to work with, sunday commenced with the creation of a 1:5 model of my preposed idea. 


We started off by a reading of patch dynamics, at first some what complicated to me, talking it over with my peers soon clarified most of it...the theory of modeling the changing environment in an almost patchy display, where the environment is forever changing, and ways of capturing this change, is the basic overview of this reading(two essays). 


Wednesday was followed up with some augmented drawings, holding up a drawn bed on a piece of paper and taking a photo of it...then explaining why we would want to 'wake up' in such a place, at first i was hesitant of this idea of waking up, say in a park, but I found a nice little corner shop, where i begin taking photos. A very reflective windowed room caught my attention, looking into a room but in turn looking out to the city. This lead to a very simplistic drawing of a room with one of the framed windows of the room, with a window looking out to the city,
Still finding it hard to come up with an idea behind this, my head just not been in that frame of mind for the week, i had a very interesting and suitable suggestion from one of my tutors-Mr Dermott, to him the idea of the piece of paper been able to be moved around, fitting into each of the three framed window slots gave me the idea of change, movement (which was a big part of my first week sections) and been able to see out to the surrounding people, but them having no idea what was even in the building, for all I know there could have been someone starring at me the whole time as I took the photos pacing back and fourth along the pavement/walkway, somewhat embarrassing?

Ideas sprang into mind on saturday, when I finally sat down properly, and really thought about my idea. But I finally figured out, where and why I would want to wake up in such an odd place. Firstly, I live in the country side, away from the 'big city', i choose an area close to the busiest streets I studied in the first week, I like having some solitude, but also been around people makes a nice CHANGE, and makes me feel more at ease. 

So I thought, why not change the area i sleep and wake up in to suit what kind of mood i'm in, or want to be in for the day, for example, solitude, I would move this room to a park, or concealed/closed off part of the city. Feeling energetic, motivated for an intense hard working day, park it out side a gym. The possibilities are endless and so are the ideas, soon writing pages and pages, until I confined it to a page with a simple sketch.

'Whatever reflects from the surroundings, onto me as I awake, sets the course of my mental, and somewhat physical side for the time I remain there, and till I sleep again, to awake
in a different space, to change the course of the next day'

This is a simple way of describing my ideas, the reflection coming from the actual material, (glass) and the city reflecting its image onto me. I also liked the idea of having a mysterious room, made of glass, near completely reflective-apart from the supporting metal framing-where i can see out onto the world, and they (the outsiders) can only be puzzled as to what is in this glass room, and what it is doing there. I decided to try and disguise it as a very basic 'coffee on the go' trailer type room. adding the bizarreness of it all. 


I designed the mobile coffee shop-not the one above, but showing what I was meaning-this one was near square, with a slopping roof, made almost entirely of reflective glass, with metal frames around all joints and edges. I certainly find it bizarre seeing what appears to be a coffee on the go cart, but reflective glass, and well no coffee.

 I made a very simple 1:5 model of my detail of 3 joints, two walls and the sloping roof, adding some environments on the external sides of the card to show the reflective idea I was going for. Adding white foam board as the metal joints.
 Above shows the per-spec material I bought at modern plastics, I asked for a 4mm, but got a 3mm, great.


This joint slips onto the angled wall piece, the top flat is for the roof to be stuck down on.


Above shows the various kinds of metal offered to me to use free of charge for my joints, which will then be soldered together and spray painted a soft colour. The workshop tutors were most helpful, but it tended to get busy, and soon I was stuck in the middle waiting for some help...even when I was first there to ask for help, this was at the Elam workshop, as the architecture one doesn't open till wednesday, which i will have to complete all the metal bending, folding and soldering in the morning, which I will have to paint, then buy some reflective material and add any finishing touches to it.

Week 1-Sections

Week one of a new semester commenced with a new design group, and a first week partner, Amy, to create two sections of desire anywhere with the triangle of Downtown auckland city. 


We were asked to create two sections, a horizontal at 1:500 scale, and a vertical at 1:100. We were concerned with the movement, speed and amount of people within three different areas over two different times-8am and 2pm. The three areas included-Mahuhukiterangi Park, Anzac Ave, and Beach Road. 


We decided to use colours for the different movements; Stationary-Blue, Jogging-, Walking-Purple, Cars-Red, Biking-Green, Bus's-Yellow. Light colours represent 8am, and dark colours 2pm. The height in centimeters of each kebab stick represented how many people were in that given area, e.g. 5cm means between 20 to 25 people (1cm=5people or less). We stuck this on our foam base with correct contours and all the buildings that the 1:500 scale model passes through (only 100mm's wide and 1000mm's long). 


Beach road appeared to be the busiest, with clearly many cars and walkers passing by in a timed interval of 2 minutes for morning and night.


 A Close up view of the sectioned 1:100 vertical cut, it was of an asian supermarket. You can see the small door, desks and shelving units, as well as the coloured kebab sticks.
 Three more doors were made from textured card from Gordan Harris, as well as all the materials used to make this model.
 The Model from a distance, all measurements are very accurate, and the hidden rooms to the best of our knowledge.
 Front view of the model, with a width of 100mm's, and length of 220mm's.
 All the models were placed together, and many needed to be cut up to fit, to the dismay of many people.
 "Intersections' of models criss-cross over each other, some major demolish-ins were underway, me and amy were one of the lucky ones, with only a minor section cut off.
Aerial view, somewhat iconic of american freeways.

 An aerial view of the top half of our 1:500 horizontal section. Beach Rd on the far left, Anzac Ave in the middle (Indicated by the black strips-as the roads-and coloured kebab sticks).